Installation
Before We begin testing in Schemathesis we will need to install it as well a Python environment.
For advanced users and CI/CD, an official docker image of Schemathesis is available as well.
Python Environment
In order to use Schemathesis on your local computer, you need a Python environment. If you don't have Python installed, you can download it from the official website. During the install process, make sure to check the box that says "Add Python to PATH", and make sure you install PIP too.
Schemathesis
After you set up your python environment on a new terminal or cmd window, run the following command to install Schemathesis:
python -m pip install --upgrade schemathesis
# Verify installation
schemathesis --version
PATH variable - Windows
It is possible that in the end of schemathesis' installation process you will get a message that you need to add a path to your PATH variable.
To resolve this:
- Open Start Menu in windows and search for "Environment Variables".
- Click on "Edit the system environment variables".
- Click on "Environment Variables" button.
- In the "System variables" section, select the "Path" variable and click on "Edit".
- Click on "New" and paste in the path that you got in the terminal.
- Click "OK" on all windows.
If you follow these steps, you should be able to run the schemathesis command from any directory.
On Linux/MacOS systems, this is usually done automatically if your Python and Pip is set up correctly.
Running a Test
After you set up Schemathesis you only need to use the run command to perform a test.
Options
For the run options and arguments execute:
schemathesis run --helpFor now let's use the default and minimum required options for a generic api test.
Base URL
The base URL is the URL of the API you want to test. You can provide it as an argument to the run command and this is the only required argument in this guide if you run completely locally:
schemathesis --base-url http://api.dev.example.com
# or
schemathesis -b http://api.dev.example.com #short version
Authentication
When it comes to authentication there are 2 arguments you need to use the authentication details and the type:
schemathesis --auth-type basic --auth username:password
# or
schemathesis -A basic -a username:password # short version
Checks (AKA Test Types)
Checks are the types of tests that Schemathesis will perform. The default is the check for not a server error, but you can specify other single check or a list of checks.
schemathesis --checks not_a_server_error,status_code_conformance
# or
schemathesis -c not_a_server_error,status_code_conformance # short version
You can perform the following checks:
not_a_server_errorstatus_code_conformancecontent_type_conformanceresponse_headers_conformanceresponse_schema_conformancenegative_data_rejectionignored_authall
Data Generation
Finally the data generation. Schematesis can test your API with different data generation methods.
- positive - Only valid data
- negative - Only invalid data
- all - Both valid and invalid data
To use this argument:
# Replace 'all' with the desired method
schemathesis --data-generation-method all
# or
schemathesis -D all # short version
API Documentation
In order to run the test in the CLI, you need to have the API documentation, defined in a JSON or YAML file.
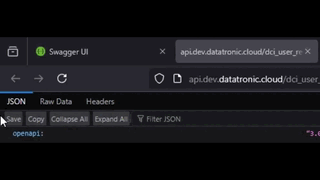
Swagger
In the self hosted Swagger UI, you can find the JSON file by clicking at the link under the OpenAPI Definition header.
Find the API docs json

Save the json from your browser
Assembly of the Command
Based on what we learned for the minimum viable test, you can use the following command:
schemathesis run -D all -c not_a_server_error,status_code_conformance -A basic -a username:password -b http://api.dev.example.com api-docs.jsonTypically, you would add the path to the API documentation file first and then include the arguments and options. However, since we have a large number of options, we decided it would be more practical to handle it this way instead.
WARNING
Never send the command with the actual test account credentials encased in it!
The Actual Run
If you've encountered no errors, you should see the test results in the terminal. If you see any errors, make sure to check the error message and the command you sent.
Example Output
Testing process

Result
